Last updated on March 7th, 2025 at 12:56 am
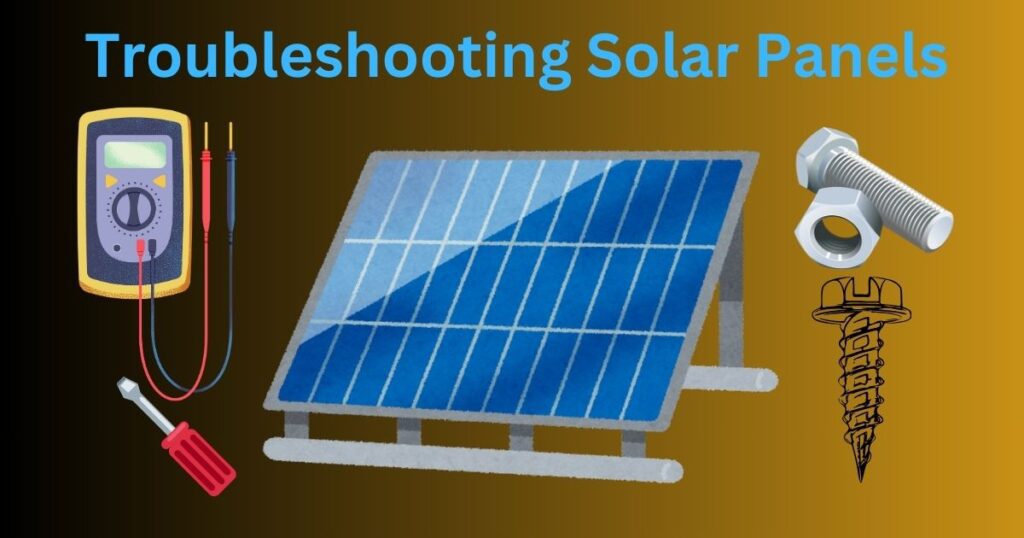
How to troubleshoot solar panels is an essential skill for anyone relying on solar energy. Proper maintenance and timely identification of issues can ensure your solar system operates efficiently and lasts longer.
This article will help you understand the most common problems, providing step-by-step instructions to diagnose and fix them, so you can maximize your energy production and investment.
- By troubleshooting issues with the solar panels, you can enhance their efficiency and energy production, and increase ROI.
- Reduced power output, panel damage, faulty wiring, and poor installation are common issues with solar panels.
- Use a multimeter to measure the output and compare it with the expected performance to ensure that your solar panels are working properly.
Importance of troubleshooting for maintaining solar panel efficiency
Regular troubleshooting of your solar panels is crucial for maintaining their efficiency. By identifying and addressing issues early, you can prevent small problems from becoming major ones, ensuring your system consistently produces the maximum amount of energy.
Common issues that can arise include reduced power output due to dirt or debris, inverter malfunctions, faulty wiring or connections, and physical damage to the panels.
Proper maintenance not only extends the lifespan of your solar panels but also safeguards your investment, helping you save on energy costs.
How do I check if my solar panels are working properly?
Measure Output with a Multimeter
Using a multimeter to measure the electrical output of your solar panels is a straightforward process, but it requires careful attention to detail. Here’s a step-by-step guide to help you through it:
Set up the multimeter: First, you’ll need to set up your multimeter to measure DC voltage. Most multimeters have a dial or button that lets you select the type of measurement. Look for the DC voltage setting, usually indicated by a “V” with a straight line next to it (as opposed to AC voltage, which has a wavy line). Once you’ve selected the correct setting, you’re ready to start measuring the voltage output of your solar panels.
Measure voltage: Now, take the multimeter probes and connect them to the positive and negative terminals of the solar panel. The positive terminal is usually marked with a “+” sign, and the negative terminal with a “-” sign. Make sure the probes make good contact with the terminals to get an accurate reading.
Look at the multimeter display to see the voltage reading. This should be close to the panel’s rated voltage, which you can usually find on a label on the back of the panel. For example, if the panel is rated at 20 volts, your reading should be around this value on a sunny day. If it’s significantly lower, it might indicate a problem with the panel.
Measure current: Switch your multimeter to the DC current setting (marked with “A” and a straight line). Carefully disconnect the positive wire from the solar panel. Attach the positive probe to the disconnected positive wire and negative probe to the panel’s positive terminal.
Look at the reading on the display and compare it with the panel’s specifications. If your panel is rated for 5 amps, you should see a similar value. A much lower reading could suggest an issue.
Compare with Expected Performance
Analyzing your solar panel system’s output is crucial to ensure it’s working efficiently. Start by looking at your energy bills over the past few months. Your bills often include data on how much energy your solar panels have produced. By comparing the current energy production with previous months, you can identify any significant drops in performance.
For instance, if you notice that your energy production has decreased by 20% compared to the same month last year, it might indicate a problem. This drop could be due to seasonal changes, but if it’s more than expected, you should investigate further.
Modern solar systems come with monitoring software such as SolarEdge Monitoring or PVsyst that allows you to track your energy production in real-time. These tools are incredibly useful for keeping an eye on your system’s performance. By regularly reviewing this data, you can spot any trends or sudden changes.
For example, if your system usually produces around 30 kWh per day but suddenly drops to 15 kWh without any clear reason, it could indicate an issue such as a shading problem, dirty panels, or a technical malfunction. The software often provides graphs and charts that make it easy to see how your system is performing over time.
Check the Performance During Peak Sunlight Hours
Assessing the performance of your solar panels during peak sunlight hours is crucial for getting an accurate understanding of their efficiency. The best time to check your solar panels’ performance is during peak sunlight hours, typically between 10 AM and 2 PM.
During these hours, the sun is at its highest point in the sky, providing the most direct and intense sunlight. Conducting your tests on a clear, sunny day will give you the most accurate readings. Cloudy or overcast conditions can significantly reduce the amount of sunlight reaching your panels, leading to lower output measurements.
5 Common Solar Panel Problems and Their Troubleshooting
Problem 1: Reduced Power Output
If you’re noticing reduced power output from your solar panels, here’s how to troubleshoot the issue based on common symptoms:
Symptoms:
- Decreased energy production compared to previous data: If your solar system is generating less energy than usual, it’s a clear sign that something might be wrong. You can compare current energy production with past data from your energy bills or system logs to spot any significant drops.
- Inverter shows low power output: The inverter’s display might show lower power output than expected. Many inverters have indicators or digital displays that can help you diagnose performance issues.
Troubleshooting Steps:
-
Check for shading: New obstructions like trees or buildings can cast shadows on your panels, reducing their energy production. Examine your panels throughout the day to see if any new sources of shading are affecting them. Addressing shading issues may involve trimming trees or removing obstacles.
-
Clean the panels: Dust, dirt, and debris on your panels can block sunlight and lower their efficiency. Clean your panels with water and a soft cloth or sponge to remove any buildup. Regular cleaning helps maintain optimal performance, especially if you notice a decrease in power output.
-
Inspect for damage: Look for visible signs of damage such as cracks, chips, or discoloration on the panels. Physical damage can impair the panel’s ability to generate power. If you find significant damage, consult a professional to assess whether repairs or replacements are needed.
Problem 2 : Inverter Issues
If your inverter is not functioning properly, follow these steps to diagnose and resolve the issue:
Symptoms:
- Inverter displays error codes: Your inverter might show specific error codes on its display. These codes can indicate a range of issues.
- No power output shown on the inverter: The inverter might not be producing any power, or its display could be showing no output.
Troubleshooting Steps:
-
Read error codes: Start by consulting the inverter’s manual to understand what the error codes mean. The manual will provide details on common issues and recommended solutions based on the codes displayed.
-
Reset the inverter: Sometimes, simply resetting the inverter can resolve the issue. Turn off the inverter and wait a few minutes. Then, power it back on and check if the problem persists. This can help clear any temporary faults or glitches.
-
Check inverter status lights: Most inverters have status lights that indicate whether they are receiving power and functioning correctly. Make sure the inverter is showing normal operational lights, and verify that it is properly connected to a power source.
-
Inspect wiring: Examine all wiring between the solar panels and the inverter. Look for any loose, damaged, or disconnected wires. Ensure all connections are secure and free from corrosion or wear, as poor wiring can affect the inverter’s performance.
-
Consult the manufacturer: If you’ve tried the above steps and the issue persists, contact the inverter manufacturer’s support team. They can provide further assistance and troubleshooting based on their expertise and knowledge of the specific model.
Problem 3: Faulty Wiring or Connections
Faulty wiring or connections can significantly impact your solar system’s performance. Here’s how to troubleshoot and resolve these issues:
Symptoms:
- System intermittently produces power: If your solar system is not consistently generating electricity, there may be a problem with the wiring or connections.
Troubleshooting Steps:
-
Visual inspection: Begin by carefully examining all wiring and cables. Look for any signs of fraying, loose connections, or corrosion. Damaged wires can interrupt the flow of electricity and reduce system performance.
-
Check connectors: Ensure that all connectors are properly attached and secure. Loose or disconnected connectors can cause intermittent power production. Make sure each connector is firmly in place and that there is no visible damage to the connectors themselves.
-
Test continuity: Use a multimeter to check for continuity in the wiring. Set the multimeter to measure continuity and test the wires to ensure that the electrical path is complete. If there is no continuity, it indicates a break or fault in the wire that needs to be addressed.
-
Replace damaged wiring: Any sections of wiring that show signs of damage or wear should be replaced immediately. Continuing to use damaged wires can lead to further issues and potential safety hazards. Replace faulty cables with new ones that meet the system’s specifications.
-
Secure connections: Tighten any loose connections to ensure they are properly secured. Loose connections can cause intermittent issues and affect overall system performance. Use appropriate tools to tighten connections without over-stressing the components.
Problem 4: Panel Damage
If you suspect damage to your solar panels, here’s how to diagnose and address the issue:
Symptoms:
- Visible cracks or hot spots on the panels: Look for any physical damage like cracks, chips, or unusual hot spots on the surface of the panels.
- Significant drop in performance: Noticeable decreases in energy production compared to previous levels can indicate panel damage.
Troubleshooting Steps:
-
Visual inspection: Start by examining the panels for any visible signs of damage. Check for cracks, chips, or hot spots. Cracks can disrupt the panel’s ability to generate electricity, and hot spots can indicate internal issues.
-
Test individual panels: Use a solar panel tester to measure the output of each panel. This will help you identify any panels that are underperforming. Compare the output of each panel to the expected performance values.
-
Isolate damaged panels: If you find any panels that are not performing as expected, disconnect them from the system and retest to confirm they are indeed faulty. This step helps isolate the issue to specific panels.
-
Replace panels: Once you’ve identified damaged panels, replace them with new ones. Properly install the new panels to ensure they are securely connected and aligned.
-
Check warranty: If your panels are still under warranty, contact the manufacturer to see if you can get a replacement for the damaged panels. Most manufacturers offer warranty coverage for defects or performance issues within a specified period.
Problem 5 : Poor Installation
Poor installation can lead to ongoing issues with your solar system. Here’s how to identify and address problems related to installation:
Symptoms:
- Persistent issues from the start: If you’ve experienced problems with your system since it was first installed, it may be due to installation errors.
- System underperforms consistently: If your solar system consistently performs below expectations, installation issues could be the cause.
Troubleshooting Steps:
-
Review installation: Start by checking if the system was installed according to the manufacturer’s guidelines. Look for any deviations from the recommended installation practices, as these can affect system performance.
-
Check alignment: Ensure that the solar panels are correctly oriented and angled. Panels should be positioned to maximize sunlight exposure. Incorrect alignment can lead to poor energy production.
-
Inspect mounting: Verify that all mounting hardware is secure and intact. Loose or improperly installed mounting components can affect the stability and performance of the panels.
-
Hire a professional: If you continue to experience issues despite these checks, it’s a good idea to have a certified technician inspect the installation. Professionals can identify and rectify any installation errors or issues that might be affecting your system’s performance.