
Last updated on April 11th, 2026 at 05:00 am
Disclaimer: This post contains affiliate links. If you buy through these links, we may earn a small commission at no extra cost to you. As an Amazon Associate, I earn from qualifying purchases.
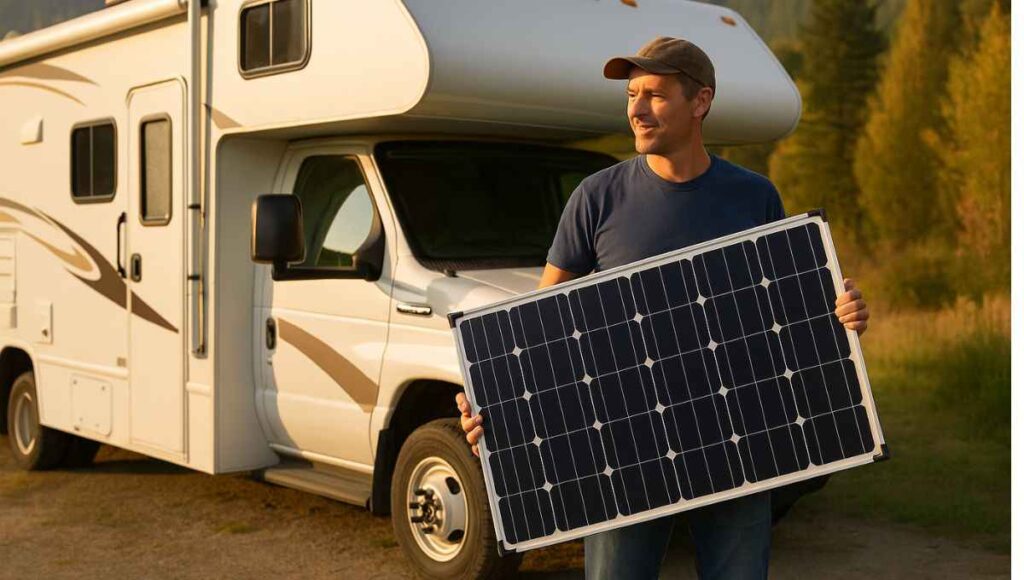
Mounting solar panels on RV is one of the smartest upgrades for anyone who loves the freedom of the open road. With a reliable solar setup, you can enjoy off-grid power anywhere the road takes you—without depending on noisy generators or crowded campgrounds.
However, proper installation is crucial to ensure safety, efficiency, and maximum performance. From securely mounting solar panels on RV roof to correctly wiring them to your battery system, each step matters.
In this article, we’ll show you exactly how to mount solar panels on your RV roof, choose the right equipment, and connect everything safely to your RV batteries. A well-installed solar setup can extend battery life, prevent power losses, and keep your RV running smoothly. We’ll also share our top five recommended solar panels for RVs to get your system up and running smoothly.
How Many Solar Panels Do You Need for Your RV?
Figuring out how many solar panels you need for your RV really comes down to one key thing—how much power you use daily. Before mounting solar panels on RV, start by estimating the watt-hours (Wh) your appliances consume. For example, running lights, a fridge, fans, and charging a laptop could total around 600–1,000Wh per day for many RVers.
Now, consider that a standard 100W solar panel can generate roughly 300 to 600Wh per day, depending on how much sun you get. So if you’re using about 700Wh daily, you’ll likely need at least two 100W panels to keep your battery charged consistently—and a little extra for cloudy days or future upgrades doesn’t hurt.
But if you go with larger panels like 200W or 300W, you’ll need fewer. One 300W panel could cover most of your needs in good sun—fewer panels, less wiring, and easier setup.
Key Components of an RV Solar Panel System
Before mounting solar panels on RV, it’s essential to understand the key components that make up a complete and functional solar setup. Each part plays a critical role in generating, regulating, storing, and using solar energy efficiently. Here are the main components of an RV solar panel system:
Solar Panels
Solar panels are the core of any RV solar setup. They capture sunlight and convert it into electricity to power your RV’s systems. Rigid panels are best suited for permanent roof installations, while flexible panels are ideal for curved surfaces or when weight and space are concerns.
Charge Controller
The charge controller regulates the voltage and current coming from the solar panels to the batteries. This prevents overcharging and damage. MPPT controllers are more efficient and suitable for larger systems, whereas PWM controllers are a more affordable option for small-scale setups.
RV Batteries
Batteries store the energy generated by the panels so it can be used at night or on cloudy days. Common types include AGM, Gel, and Lithium-ion. Lithium batteries are lightweight, have a longer lifespan, and charge more efficiently, making them a popular choice despite the higher initial cost.
Inverter
An inverter transforms the DC power stored in your batteries into AC power, which is required for most appliances. Pure sine wave inverters are ideal for running sensitive electronics like laptops and microwaves, while modified sine wave inverters can handle basic devices more economically.
Wiring and Mounting Equipment
High-quality wiring and proper fuses ensure safe energy transfer throughout your system. Additionally, mounting brackets, sealants, and hardware are essential for securing solar panels to your RV roof. Proper installation protects the system from movement, vibration, and harsh weather while traveling.
Key Factors to Consider Before Mounting Solar Panels on RV
Mounting solar panels on RV is a great way to achieve off-grid living, but it’s important to plan carefully before you begin. Here are the 5 most crucial factors to consider:
Choosing the Right Location on Your RV
Before mounting solar panels on RV, consider your available roof space. Flat, unobstructed areas are ideal—avoid spots near vents, air conditioners, or antennae. South-facing panels get the most sun exposure, especially important if you park your RV in one direction for extended stays.
Also, think about shading—trees, other panels, and rooftop equipment can block sunlight and reduce efficiency. If your roof is too crowded or you want a more adjustable system, portable panels are a flexible alternative.
Tools Needed for Installation
Here’s a list of basic tools you’ll need before mounting solar panels on RV:
- Drill and appropriate drill bits
- Screwdriver set
- Sealant (like Dicor or silicone-based)
- Mounting brackets or adhesive kits
- Wire cutters/strippers
- Multimeter (for voltage checks)
- Wrenches and sockets
- Ladder and safety gear (gloves, glasses)
Mounting Options (Adhesive, Brackets, Tilt Mounts, etc.)
- Adhesive Mounts: Best for flat roofs and lightweight panels. Easy to install and avoid drilling holes.
- Z-Brackets: Most common for fixed installations. Require drilling but provide a strong, stable hold.
- Tilt Mounts: Great for winter RVers who need better solar angle during low sun months. Panels can be adjusted for optimal exposure.
- Rail Mounts: Often used for larger systems, allowing flexibility in panel arrangement.
Securing Panels to Avoid Damage During Travel
Mounting solar panels on RV requires extra attention because RV travel involves constant vibration, bumps, and wind force—your panels must be tightly secured. Use locking nuts or thread-locking fluid to prevent loosening over time. Ensure brackets are firmly attached, and that all sealant is applied correctly around screw holes to prevent water leaks.
Remember: poorly secured panels can become hazardous while driving. Safety always comes first when mounting solar panels on RV!
Weatherproofing and Sealing
When mounting solar panels on RV roofs, drilling holes means weatherproofing is a must! You’ll need to properly seal all mounts and connections to prevent leaks and water damage. Invest in high-quality, waterproof sealant to protect your roof from the elements, especially during rainy or snowy conditions.
How to Install Solar Panels on RV
Step 1: Plan Your Solar Power Setup
No matter how you’re mounting solar panels on RV—on the roof, the ground, or even the side—it all begins with a clear plan. Start by estimating how much power you’ll use each day. Think about your lights, fans, fridge, phone chargers, and other essentials that keep your RV life comfortable.
Once you know your energy needs, decide how you’ll mount your panels. If you want a clean, permanent setup, roof-mounted panels are ideal. For flexibility and portability, ground or foldable panels are a great pick. For tight spaces like van conversions, side-mounted panels may be an option.
After that, collect your gear: solar panels (rigid, flexible, or portable), an MPPT charge controller, a lithium or deep cycle battery, an inverter (if using AC devices), and wiring essentials like MC4 connectors, cables, and fuses.
Step 2: Choose and Prepare Your Mounting Style
There are three main options for mounting solar panels on RV—roof-mounted, portable, and side-mounted. Choose one based on your travel habits and convenience.
- If you want a fixed system that works while driving, go for roof-mounted panels. These are securely installed using mounting brackets or adhesive pads and stay in place full-time.
- If you prefer flexibility and don’t want to drill into your RV, portable solar panels are perfect. Just unfold them on the ground when you need power and pack them away when done.
- For smaller RVs or custom builds like vans, side-mounted panels are also an option. These are often hinged, allowing you to fold them out for charging and store them flat when not in use.
🔧 No matter which option you pick, make sure to plan for sunlight exposure, safe cable routing, and sturdy placement before mounting solar panels on RV.
Step 3: Install or Position the Panels
- Clean the RV surface (roof or side) where the panels will go, or clear the ground area for portable panels.
- Measure and mark placement spots—make sure to avoid vents, fans, and AC units for roof/side installs. For portable panels, angle them toward the sun using the included stands.
- If you’re installing on the roof or side, use mounting brackets or adhesive pads. Drill holes only if needed, and seal all screw points with waterproof sealant to prevent leaks.
- For portable systems, simply connect the panel cable to your charge controller or battery, and you’re ready to charge.
🛠️ Pro Tip: Whether the panel is mounted on the roof, placed on the ground, or fixed on the side—make sure it’s secure, well-positioned in the sun, and all wiring is safe and weatherproof.
Step 4: Mount the Solar Panels
- Put the panels in place: Attach the panels onto the brackets or adhesive mounts.
- Double-check everything: Make sure the panels are secure and there’s no movement.
- Tilt the panels slightly (if you can): This will help with rain runoff and maximize sun exposure.
Step 5: Connect the Wiring
- Run the wires: Connect the solar panel wires to the charge controller using UV-resistant cables.
- Seal the wire entry points: When the wires go through the roof, seal them with weatherproof seals to prevent leaks.
- Install the charge controller inside your RV: Put the controller near your battery bank.
- Connect the wires: Attach the solar panel wires to the charge controller’s “solar” input. Connect the controller to your battery bank, making sure to match the positive (+) and negative (-) terminals.
⚡ Safety first: Use fuses or breakers to protect your wires.
Step 6: Test the System
- Turn on the charge controller: Check if it detects power from the panels.
- Check battery charging: Make sure the batteries are charging.
- Use a multimeter: This tool checks if the voltage is right and everything is working properly.
- Secure all wires: Use zip ties or cable holders to keep the wires tidy and safe.
How to Mount Solar Panels on RV Roof?
A. Clean the Roof Surface
Use a soft brush and mild soap to clean dirt, dust, or grease. A clean surface helps adhesive or brackets stick better and prevents future leaks.
B. Plan the Panel Placement
Lay the panels on the roof temporarily. Avoid vents, A/C units, and skylights. Leave some space around each panel for airflow and maintenance.
C. Mark the Mounting Points
Use masking tape or a pencil to mark where the brackets or adhesive mounts will go. Make sure everything lines up before drilling or sticking.
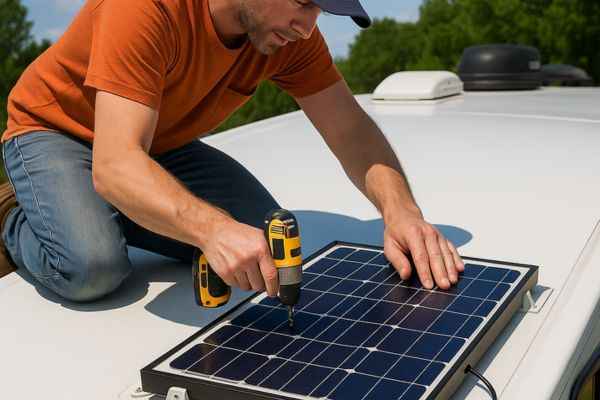
D. Install Mounting Brackets or Adhesive Pads
When mounting solar panels on RV rooftops, if you’re using brackets, drill small pilot holes, apply sealant around the holes, and screw the brackets into place with stainless steel screws. For adhesive pads, simply apply the adhesive as instructed by the manufacturer, press the mounts down firmly on the cleaned surface, and let them cure for 24–48 hours.
E. Mount the Panels
Attach the panels to the installed mounts. Tighten all bolts or fasteners. If using tilt mounts, adjust them for the best sun exposure.
F. Seal All Entry Points
Apply waterproof sealant around screw holes, mounts, or cable entry points to prevent leaks.
G. Route the Wires Inside the RV
Use cable entry glands or weatherproof grommets to bring the wires into the RV. Seal around them to stop water from getting in.
H. Connect to the Charge Controller and Battery
Inside the RV, wire your solar panels to the MPPT charge controller, then connect the controller to your RV batteries. Use fuses or circuit breakers for safety.
I. Test the System
Power on the charge controller. It should show solar input and battery charging. Use a multimeter to check voltage if needed.
How to Hook Up Solar Panels to RV Batteries?
Once the panels are in place, it’s time to connect them to your battery so they can store the energy they generate.
🔌 Understanding the Solar Wiring System
Solar panels create electricity (DC power). This electricity needs to go through a charge controller, which regulates the power before it reaches your battery.
⚡ Connecting the Solar Panels to the Charge Controller
- Attach the panel wires to the “solar” input on the charge controller.
- Install the charge controller inside the RV, near your battery bank for easy access.
🔋 Connecting the Charge Controller to the Battery Bank
- Connect the charge controller’s battery output to your battery. Be sure to connect the positive (+) and negative (-) terminals correctly.
- If you have multiple batteries, ensure they are set up properly (either in series or parallel).
⚙️ Series vs. Parallel Wiring for Batteries
- Series wiring: This increases the battery voltage.
- Parallel wiring: This keeps the voltage the same, but increases the battery capacity.
🛠️ Troubleshooting Common Hookup Problems
- No power from the panels? Check all your connections and see if the charge controller is showing any errors.
- Incorrect battery voltage? Double-check your wiring and make sure the charge controller matches your battery system.
Top 5 Best Solar Panels for Your RV: Our Recommendations
1. Renogy 100 Watt 12V Monocrystalline Solar Panel
The Renogy 100 Watt 12V monocrystalline solar panel is a reliable and compact choice for RV owners. With 22% efficiency thanks to advanced PERC and 9-busbar tech, it delivers strong performance in a lightweight (14.1 lbs) and space-saving design. It’s ideal for small RV roofs and provides around 500Wh of power per day under good sunlight.
Built to handle tough weather, this panel features an IP65 rating, tempered glass, and a corrosion-resistant aluminum frame. It installs easily with pre-drilled holes and works with various Renogy mounts. Backed by a 10-year workmanship warranty, it’s a dependable option for off-grid RV adventures.
2. ZOUPW 100W Portable Solar Panel
The ZOUPW 100W portable solar panel is a smart choice for RV owners who want both efficiency and portability. With 23.5% conversion efficiency, it captures maximum solar energy—even in less-than-ideal sunlight. Its foldable, lightweight design (under 10 lbs) and built-in kickstands make setup quick and hassle-free, perfect for RV trips, camping, or emergencies.
This panel also includes multiple output options—USB-A, Type-C, and MC-4—with built-in smart IC chip protection. That means you can safely charge everything from phones to power stations. Plus, its IP67 waterproof rating and ETFE coating ensure long-lasting durability, even in tough weather. Great performance, easy portability, and wide compatibility make this a solid RV solar companion.
3. BougeRV 200W Fiberglass Flexible Solar Panel
The BougeRV 200W Fiberglass Flexible Solar Panel is perfect for RV owners who need a versatile and durable solar solution. Its flexibility allows it to bend up to 270°, making it ideal for curved surfaces on your RV roof, maximizing available space for optimal sunlight absorption.
Weighing just 7 lbs and 2mm thick, this lightweight panel is easy to carry and install. The ETFE covering ensures long-lasting durability, while the 10BB cell design offers 23% conversion efficiency, providing reliable power. With simple installation options, it’s an excellent choice for any RV setup.
4. The ECO-WORTHY 195W Bifacial Solar Panel
The ECO-WORTHY 195W Bifacial Solar Panel is an excellent choice for RV owners who want to maximize energy generation in a compact space. Thanks to its bifacial design, it captures sunlight from both the front and the back, boosting power output by up to 33% more than traditional panels.
Its 12BB cell technology enhances efficiency and performance, even under partial shade—making it perfect for varying lighting conditions during RV travel. Built for long-term outdoor use, this panel is weather-resistant, lightweight (just over 20 lbs), and compact, saving space on your RV roof.
Its rugged aluminum frame and composite materials resist rust and corrosion, while withstanding heavy snow and wind. Whether you’re camping in the summer or exploring during winter, this panel delivers consistent power year-round—ideal for an off-grid RV lifestyle.
5. WUZECK 300W Solar Panel Kit
The WUZECK 300W solar panel kit is a reliable and efficient solution for RV owners seeking off-grid power. Made from high-performance PERC monocrystalline cells with 23% efficiency, it ensures excellent energy output in full sunlight. The kit includes two 150W panels that can be used in either 12V or 24V systems, making it flexible for different RV setups and future expansion.
Built to withstand harsh outdoor conditions, these panels feature a corrosion-resistant aluminum frame and are IP65+ waterproof, making them ideal for long journeys through deserts, coastal areas, or snowy regions. With pre-drilled holes and compatibility with multiple mounting brackets, installation is quick and hassle-free—perfect for mobile, off-grid lifestyles.
Final Thoughts
In conclusion, mounting solar panels on RV transforms your travel experience by providing reliable and sustainable power no matter where you go. Choosing between roof-mounted, portable, or side-mounted panels depends on your specific RV lifestyle and power needs. With the right planning and installation, your solar system can handle the energy demands of daily life while you’re on the road.
When mounting solar panels on RV, it’s not just about placing the panels; it’s about selecting the right wattage and ensuring a secure, long-lasting setup. From powering lights and appliances to running an air conditioner, a properly installed solar system makes your RV adventures much more convenient and energy-efficient.
Frequently Asked Questions (FAQs)
What is the best place to mount solar panels on my RV?
The roof is the best place for solar panels, offering maximum sun exposure and safety during travel. Side-mounting or portable panels are also options depending on space and needs.
Can I use portable solar panels instead of mounting them on my RV roof?
Yes, portable panels are great for flexibility and shaded camping areas. However, roof-mounted panels provide a permanent solution and save space inside your RV.
How do I wire solar panels to my RV battery?
Connect the panels to an MPPT charge controller, then link the controller to the battery. Use the correct gauge wires, MC4 connectors, and install inline fuses for protection.
Do I need to drill holes to mount solar panels on my RV roof?
It depends on the method. Roof-mounted panels with brackets may require pilot holes, while adhesive pads offer a drill-free option. Seal any drilled holes to prevent leaks.
Can I use solar panels to run an air conditioner in my RV?
Yes, you can, but you’ll need a large solar panel system, typically 600W or more, along with a sufficient battery bank. Air conditioners draw a lot of power, so multiple high-wattage panels are necessary to meet the demand, including the startup surge.